Making your own sweet chestnut flour is a rewarding culinary adventure! With its mildly sweet and nutty flavour, sweet chestnut flour adds a unique twist to various dishes, from baked goods to savoury recipes. Making sweet chestnut flour is worthwhile, especially if you have an intolerance to wheat as this sweet tasting flour is gluten free.
In this article, we will explore the process of making sweet chestnut flour from scratch, sharing valuable insights and tips along the way.
Why Chestnuts are Good for Making Flour
Chestnuts have been a part of human diets for thousands of years and are celebrated for their rich flavour and nutritional value. Chestnut is a good source of carbohydrate and low in fat, and has long been referred to as ‘the grain that grows on trees’. Unlike other nuts, the texture is naturally floury, making it good for turning into a speciality flour.
Chestnut flour is gluten-free, making it a suitable alternative for those with gluten sensitivities or celiac disease. It provides an option for individuals looking to enjoy baked goods without traditional wheat flours.
Chestnuts, and by extension chestnut flour, are a good source of nutrients. This includes fibre, vitamins (such as vitamin C and B vitamins), minerals (potassium, copper and manganese), and antioxidants. This nutrient profile adds nutritional value to foods made with chestnut flour.
Chestnut flour is also comparatively lower in fat compared to some other nut flours. This can be a benefit for those preferring lower-fat alternatives or aiming to reduce their overall fat intake.
What Can I Make with Chestnut Flour?
The versatility of chestnut flour lends itself to a wide range of culinary creations. Because sweet chestnut flour has no gluten, it does not rise. The means you can make a delicious variety of flat-breads with a chestnut flour base. Here are a few other examples of what you can make with chestnut flour:
- Baked Goods: Chestnut flour can be used as a gluten-free alternative in baking. It adds a unique nutty flavor and moist texture to recipes like cakes, cookies, muffins, and bread.
- Pancakes and Crepes: Substitute a portion of regular flour with chestnut flour to create deliciously nutty pancakes and crepes. These have a lovely natural sweetness that pairs well with various sweet or savory toppings.
- Pasta and Noodles: Combine chestnut flour with other flours, such as all-purpose or semolina, to make fresh pasta or noodles. The addition of chestnut flour adds an earthy taste and enhances the overall texture.
- Thickening Agent: Chestnut flour can be used as a thickening agent in sauces, gravies, and soups. It adds a unique flavor profile while providing a smooth and rich consistency.
- Coatings and Breading: Use chestnut flour as a coating or breading for frying or baking. It can be a great alternative to traditional breadcrumbs, adding a delightful nuttiness to breaded chicken dishes or vegetable fritters.
- Porridge and Puddings: Use chestnut flour to make creamy and hearty porridge or puddings. Its sweet and nutty taste enhances the overall flavor and provides a delightful alternative to traditional oatmeal or rice-based desserts.
Experiment with your favorite recipes to incorporate chestnut flour, and let your creativity take flight in the kitchen. Remember to consider the unique characteristics of chestnut flour when substituting it for other flours, as it may require adjustments in liquid ratios or leavening agents.

How to Make Sweet Chestnut Flour
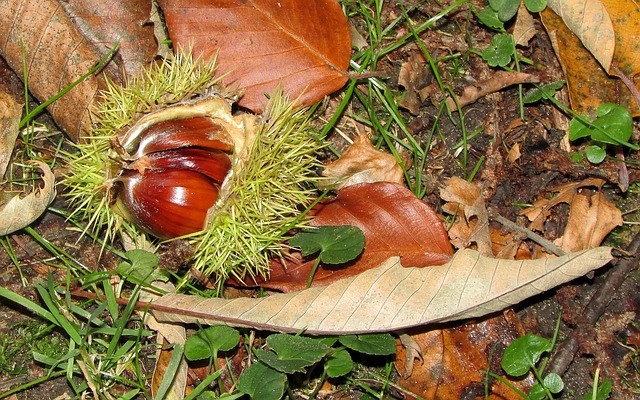
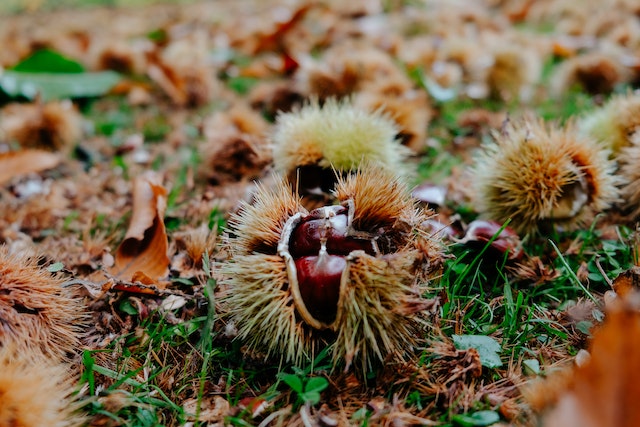
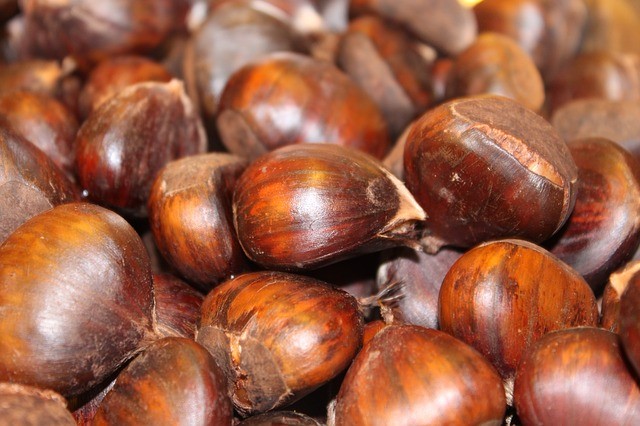
Begin with the raw chestnuts that you have foraged or bought. Sweet Chestnuts are abundant in autumn in the UK, so they are a good way to supply food for the table over winter. See more about foraging for sweet chestnuts here.
The basics of making flour from sweet chestnuts is simple: Roast, Peel, Dry, Blend.
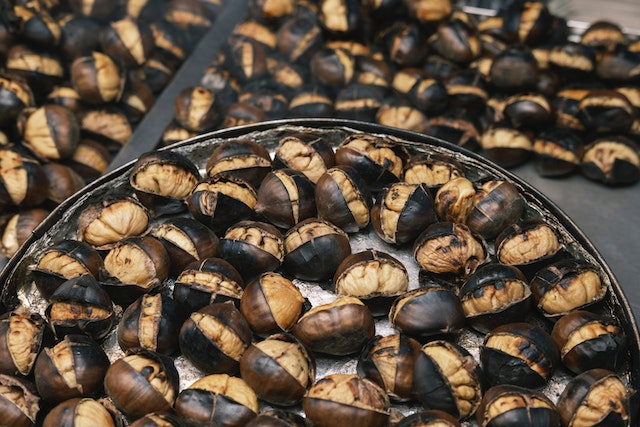
Roast – On the flat side of the nut, score an X with a sharp knife. This stops steam from building up inside the shell, preventing the chestnuts from exploding! Place them on a baking tray or a sheet of grease proof paper, and roast in an oven for about 30 minutes or until the shells begin to curl up at the slits you made. Learn more about roasting sweet chestnuts here.
Peel – The heat will make the shells soft and easy to peel, so do it while the chestnuts are still warm.
Dry – Now the nuts need to be dried out further, so they grind into a mealy powder rather than a moist mash. You can leave them for a day or two in a warm place, or by putting them in a very low oven for a few hours. There are food dehydrators available to buy, and this is probably the best option if you want to dry lots of different foods to store, as they are convenient and easy to use. Plus, you don’t have to keep an eye on an oven for hours.
You can tell when chestnuts are dry when they harden, so that you can’t break with them with your fingers.
Blend – Use a food processor or spice grinder to grind the dried chestnuts to the desired consistency. If you can feel any moisture in the flour, spread it out and allow to fully dry. It might take a few goes in a blender to get it to a fine consistency, but if you are using it for cookies and biscuits, a few coarse crunchy bits add texture.
How to Store Chestnut Flour
Proper storage of chestnut flour is crucial for maintaining its freshness and preventing rancidity.
Transfer the chestnut flour to an airtight container, such as a glass jar or food-grade plastic container, to protect it from moisture, air, and pests. Ensure that the container has a tight-fitting lid to create a seal.
Store the container of chestnut flour in a cool, dry place away from direct sunlight and sources of heat. Exposure to heat and light can accelerate the breakdown of healthy fats in the flour and diminish its quality.
Moisture can cause chestnut flour to clump and spoil. Therefore, it’s essential to store chestnut flour in a low-humidity environment to prevent moisture absorption. Avoid storing it near sinks or areas prone to moisture, such as the refrigerator or freezer.
A cool pantry or cupboard is an ideal storage location for chestnut flour. It can also be frozen and used within six months.
Periodically check the chestnut flour for signs of spoilage, such as an off odour, unusual colour, or insect infestation. If you notice any of these indicators, discard the flour immediately.
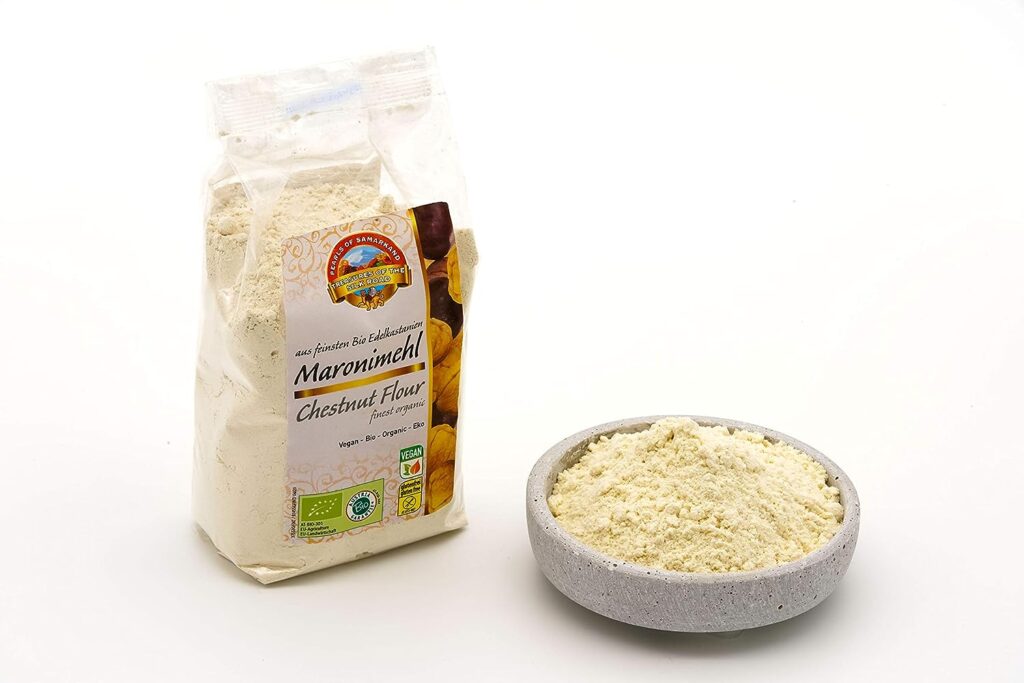
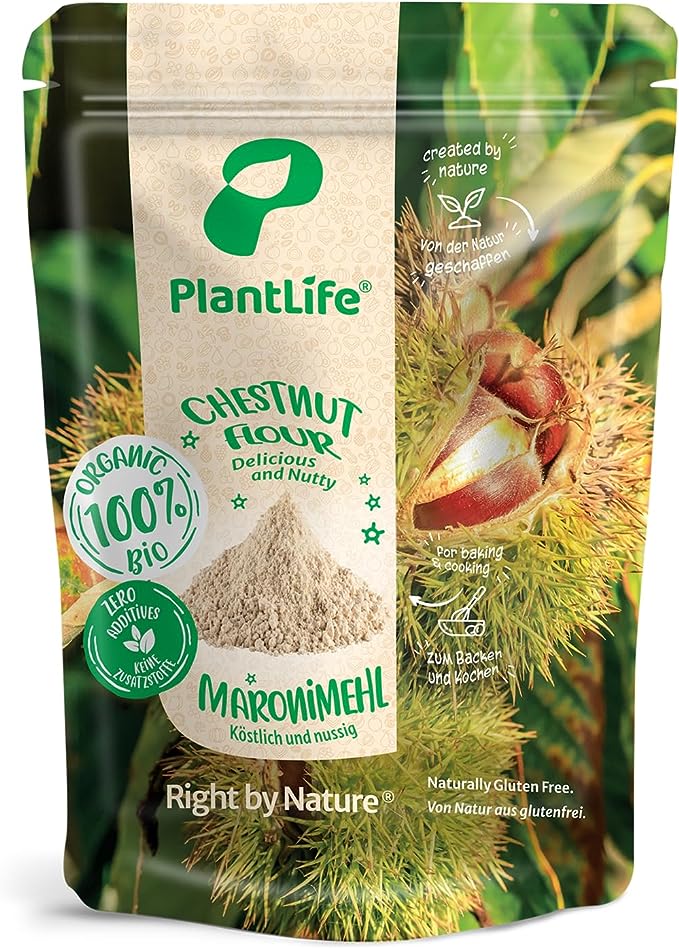
Where can I Buy Chestnut Flour?
If making your own sweet chestnut flour sounds like too much faff, it is available from specialist food stores and also from online retailers. Here’s some options:
Making your own chestnut flour may seem daunting at first, but fear not! By understanding the step-by-step procedures, you’ll be able to produce a flour that captures the essence of sweet chestnuts’ natural goodness.